Workflow Guide
The Workflow module enables the creation and management of custom role-based workflows across departments. It helps standardize processes, automate assignments, and maintain operational consistency.
🌐 Purpose
The Workflow module is designed to:
- Define and manage role-specific workflows
- Map internal processes to specific departments
- Enable smooth collaboration between teams via predefined roles

🧭 Navigation
Go to:
Workflows > Create Workflow
🖥️ User Interface Overview
The interface consists of two primary areas:
1. Workflow Listing Table
This section shows a list of all created workflows.
| Field | Description |
|---|---|
| S.No | Serial number |
| Name | Name of the workflow |
| Type | Type of workflow (e.g., Roles) |
| Created On | Date of creation |
| Created By | Name of the creator |
| Status | Current status (e.g., Draft, Active) |
| Remarks | Description or note |
| Action | Edit/Delete options |
🧩 This gives a bird's-eye view of all existing workflows.
2. Create Workflow Modal
This pop-up form appears when you click the + Create Workflow button.
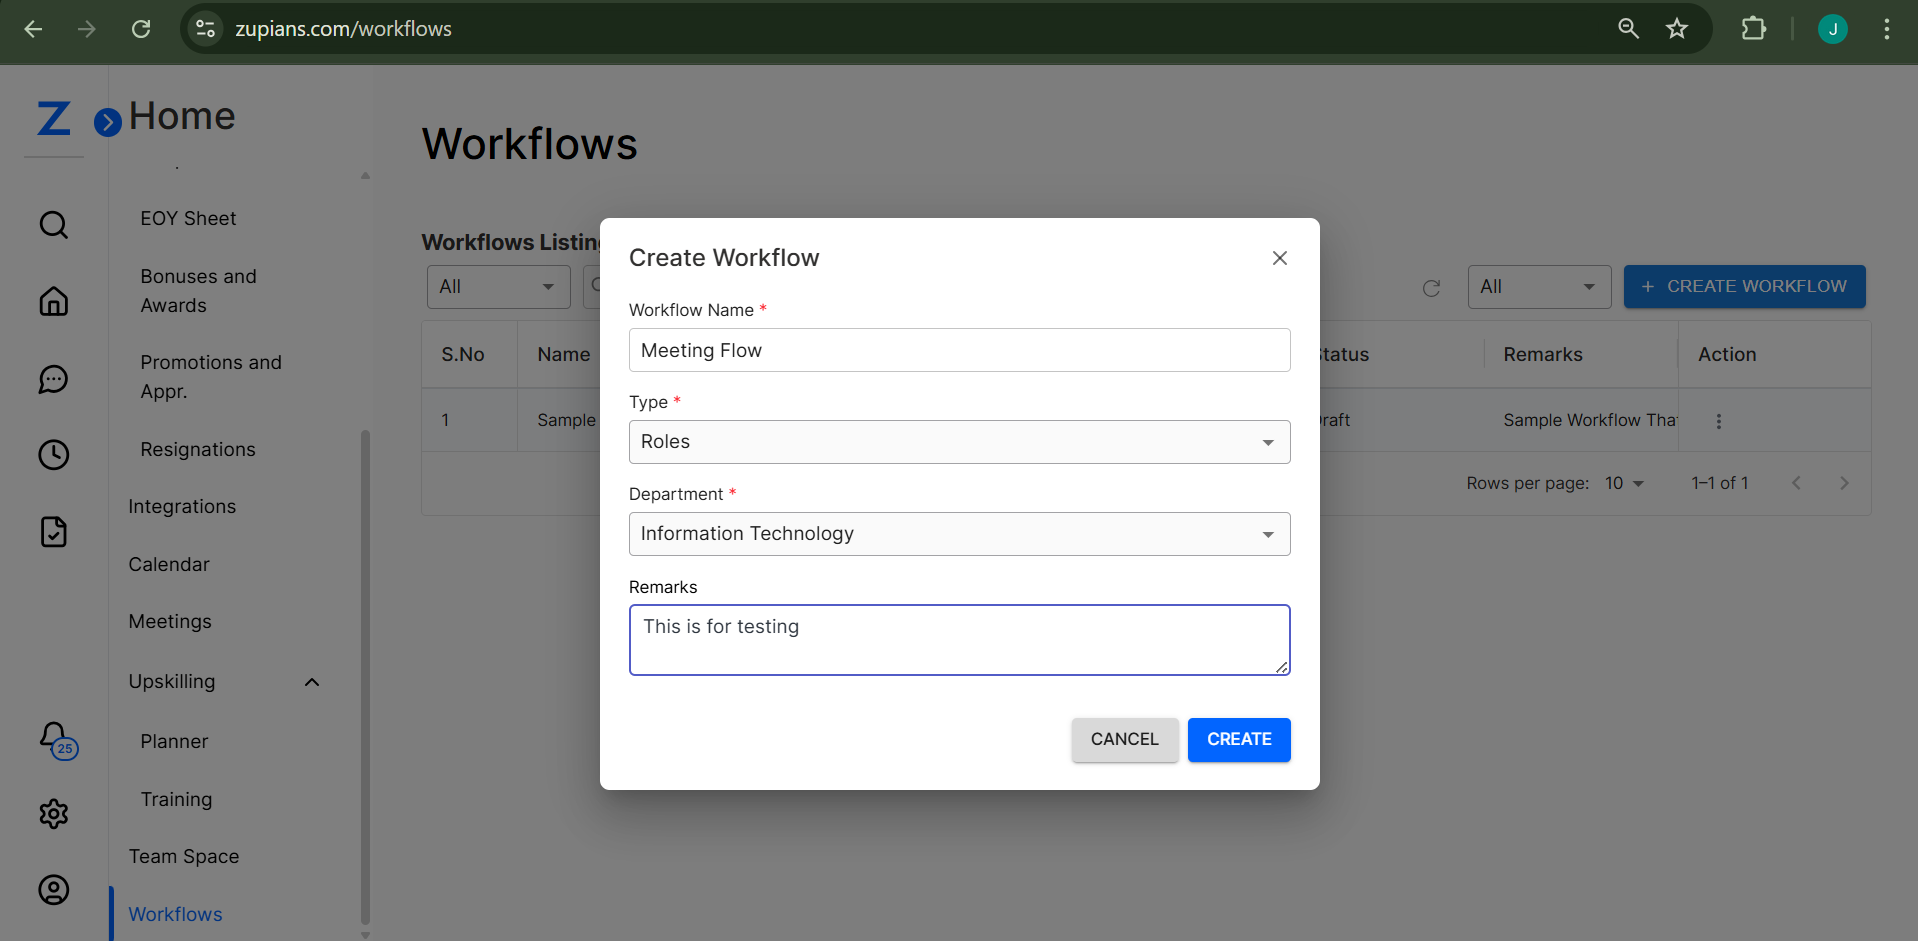
Fields:
| Field | Description |
|---|---|
| Workflow Name | Enter a unique name for the workflow |
| Type | Dropdown to select the type (e.g., Roles) |
| Department | Select the applicable department |
| Remarks | Add any additional notes (max 500 characters) |
✅ Required fields are marked with an asterisk (*)
📌 Use remarks to provide context, e.g., "Workflow for hiring approval cycle."
🛠️ Creating a Workflow
- Click on + Create Workflow
- Fill in:
- Workflow Name
- Select Type (e.g., Roles)
- Choose Department
- Add optional remarks
- Click Create to save the workflow
- It appears in the workflow listing table with a Draft status
🧬 Workflow Role Hierarchy Management
📍 Navigation
Go to:
Workflows > Click on Workflow from Workflows Listing > Roles View (Hierarchy)
🖥️ Roles Hierarchy View
This view provides a visual role hierarchy for a selected workflow.
Each role is displayed as a colored node, showing its position and connection with others in the organizational flow.
Key Elements:
| Element | Description |
|---|---|
| 🟧 Orange Nodes | Main roles (usually managerial or lead) |
| 🟦 Blue Nodes | Operational or support roles |
| 🟪 Purple Nodes | Special or hybrid roles |
| 🟩 Green Nodes | Entry-level or intern roles |
| 🔁 Arrows/Lines | Visual connections indicating reporting or flow structure |
🔍 You can zoom in/out or drag and reposition roles for better clarity.
Features:
- Interactive Drag & Drop: Rearrange roles visually
- Save Layout: Click Save at the top-right after adjustments
- Click on Roles: Opens role configuration or details
- Visual Trace: Trace the reporting chain between roles
👁️ Visual Eye View Example
Below is an example of the Roles Hierarchy as visualized within the platform:
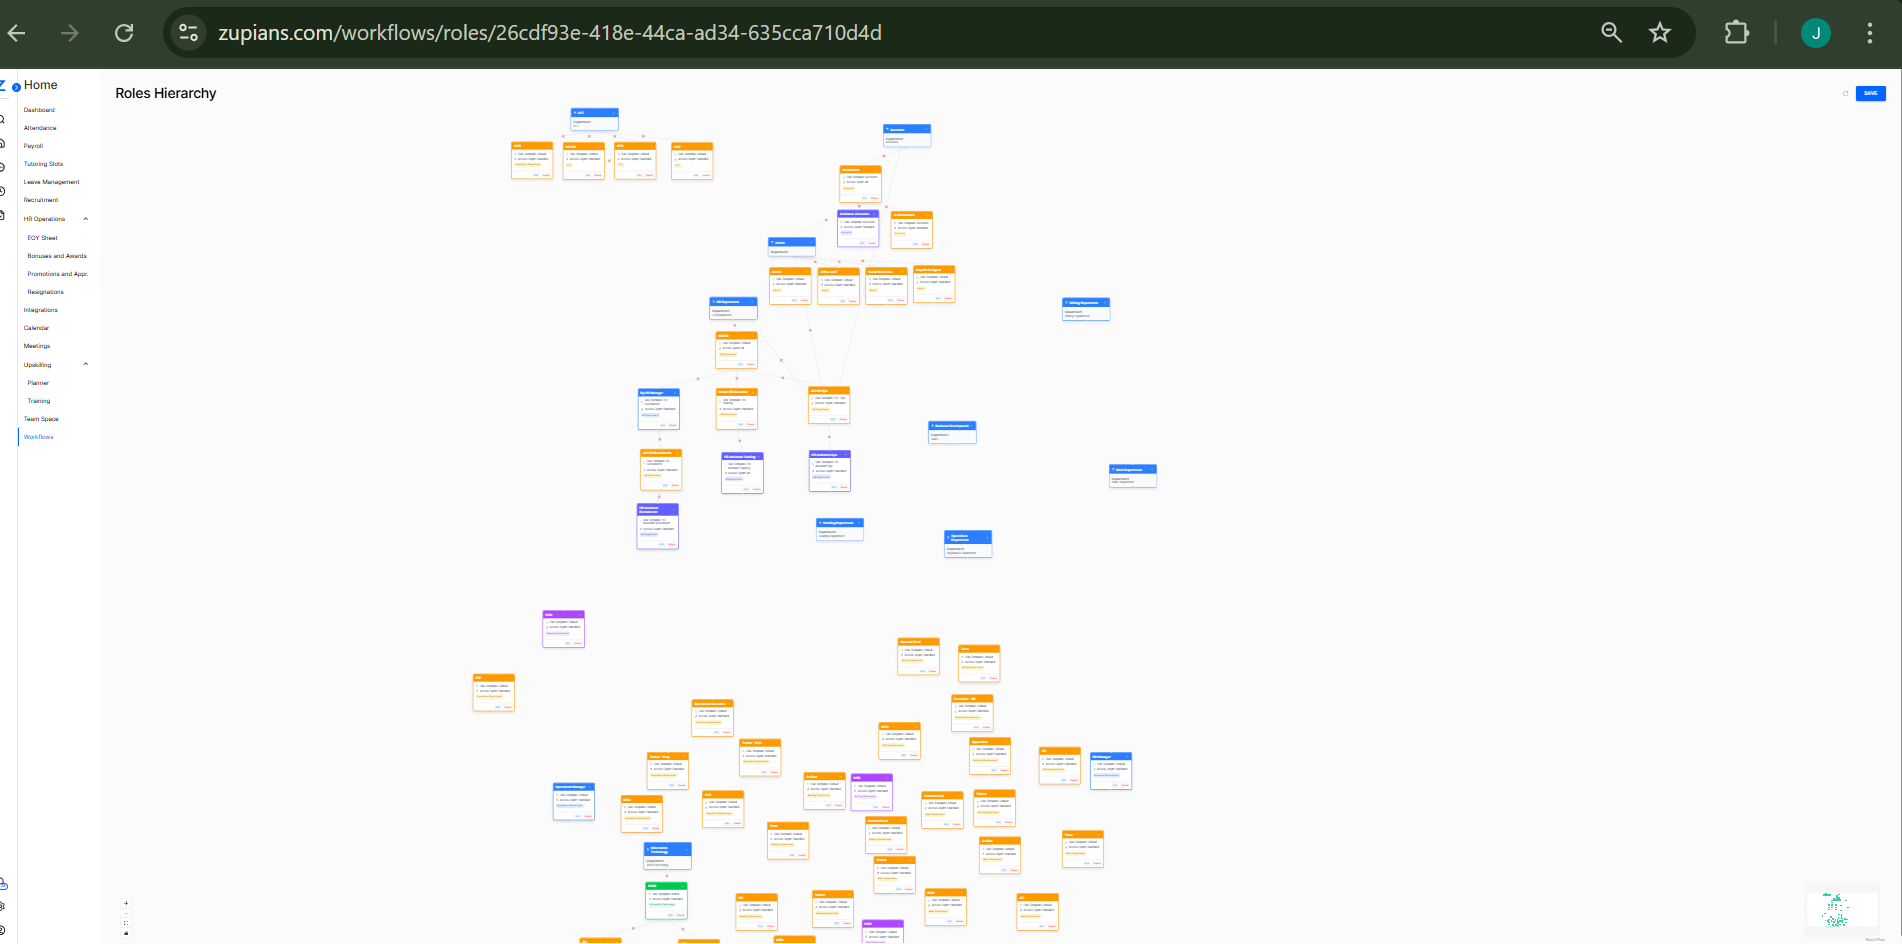
🖼️ This image illustrates how roles are structured and connected visually. It provides a comprehensive overview of role relationships and dependencies in a workflow.
🔍 Use Cases
- Automate approvals for hiring or internal promotions
- Assign responsibilities by role within a department
- Track and manage HR and Ops processes via workflows
- Visualize team structure and hierarchy in process workflows
Best Practices (Overall)
- Name workflows clearly to reflect their function
- Keep remarks concise but meaningful
- Review status (Draft/Active) periodically for outdated entries
- Use hierarchy view for structural clarity
The Workflow module simplifies internal processes by allowing teams to define clear, role-based automation tailored for departments — now enhanced with a powerful hierarchy visual tool.