Settings Guide
The Settings module in Zupians centralizes configuration options across key platform features—like user management, departments, calendars, leave policies, and more. This guide walks you through how to access and use each feature.
🌐 Purpose
- Centrally manage users, roles, and permissions
- Set up leave policies and calendars
- Organize teams and departments
- Create reusable role templates
- Configure internal trouble-shooting logic
🧭 Navigation
✅ Step-by-step navigation
- Click the ⚙️ Settings icon on the bottom-left corner of the sidebar.
- You will land on the main Settings Dashboard.
- Navigate through the tabs or cards to configure different modules.
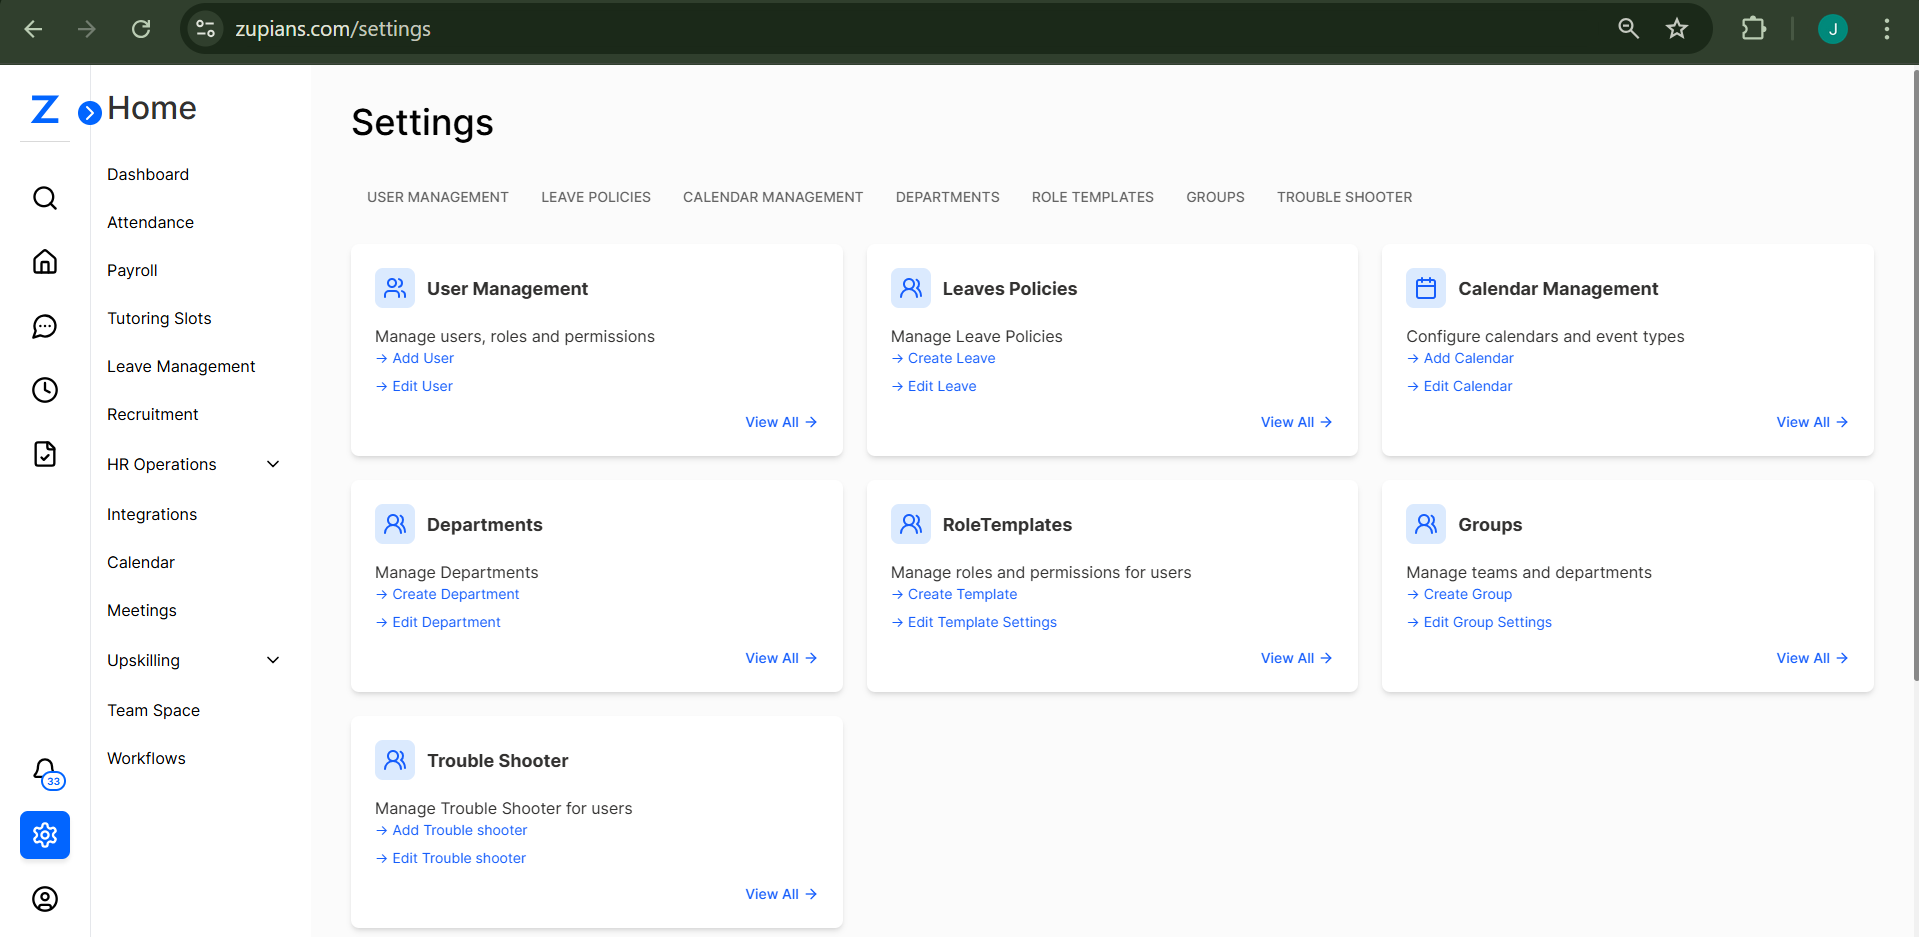
🗂️ Settings Categories and Card Actions
👤 User Management
Manage users, assign roles, and configure access permissions.
- ➕ Add User – Add a new user to the platform
- ✏️ Edit User – Modify user details or role
- 🔗 View All → Opens the complete user list
🏖️ Leaves Policies
Define company-wide leave types and rules.
- ➕ Create Leave – Add a new leave policy (e.g., sick, vacation)
- ✏️ Edit Leave – Modify existing leave rules
- 🔗 View All → Lists all leave policies
📅 Calendar Management
Configure work calendars and event types.
- ➕ Add Calendar – Set up a new organizational calendar
- ✏️ Edit Calendar – Modify workdays, holidays, and events
- 🔗 View All → View all configured calendars
🏢 Departments
Structure your organization into departments or teams.
- ➕ Create Department – Add a new department
- ✏️ Edit Department – Rename or update an existing one
- 🔗 View All → Browse all departments
👥 RoleTemplates
Reuse role and permission sets across users.
- ➕ Create Template – Define a role template for future use
- ✏️ Edit Template Settings – Modify access levels
- 🔗 View All → Lists all existing templates
🧑🤝🧑 Groups
Manage teams and cross-functional groups.
- ➕ Create Group – Form a new group with selected users
- ✏️ Edit Group Settings – Change group roles or members
- 🔗 View All → Overview of all groups
🛠️ Trouble Shooter
Set up logic to guide users when they encounter platform issues.
- ➕ Add Trouble Shooter – Create automated guidance rules
- ✏️ Edit Trouble Shooter – Update decision trees or triggers
- 🔗 View All → List of all trouble shooter entries
🧪 Example Workflow
- Click the ⚙️ Settings icon in the left sidebar.
- Select the User Management tab.
- Click Add User, fill in the name, role, and email.
- Save the user to add them to the system.
- Navigate to RoleTemplates and create a new role configuration.
- Assign this role to your newly added user.
🧠 Frequently Asked Questions (FAQ)
1. Who can access the Settings module?
Only users with: - Admin roles - Settings-related permissions can access and make changes within the Settings module.
2. Can I restrict access to departments?
Yes, using: - RoleTemplates - User Management configurations you can restrict or customize department access.
3. What’s the difference between Groups and Departments?
- Departments reflect your formal company structure. - Groups are flexible, often cross-functional teams (e.g., Project Teams).
4. How often should I update RoleTemplates?
Update your RoleTemplates: - After major org changes - During access audits or security reviews
5. Can I delete users?
Deleting is not recommended. Instead: - Deactivate users to retain logs and audit trails.
6. What is a Trouble Shooter?
It’s an automated tool that helps users resolve issues by: - Guiding through step-by-step logic - Offering relevant solutions based on inputs
7. Do changes in Calendar reflect immediately?
Yes, calendar updates are: - Reflected in real-time - Visible instantly across linked modules (e.g., Attendance, Leaves)