Recruitment Guide
This guide covers the Recruitment module, helping you understand how to view, add, and manage candidate records effectively.
🎯 Recruitment Dashboard
At the top of the Recruitment page, you’ll find quick filters and insights that give you an overview of the hiring funnel:
✅ All Candidates
✅ Test Cleared
✅ Demo Cleared
✅ Offer Accepted
✅ Rejected
Here’s a visual example of the Recruitment dashboard:
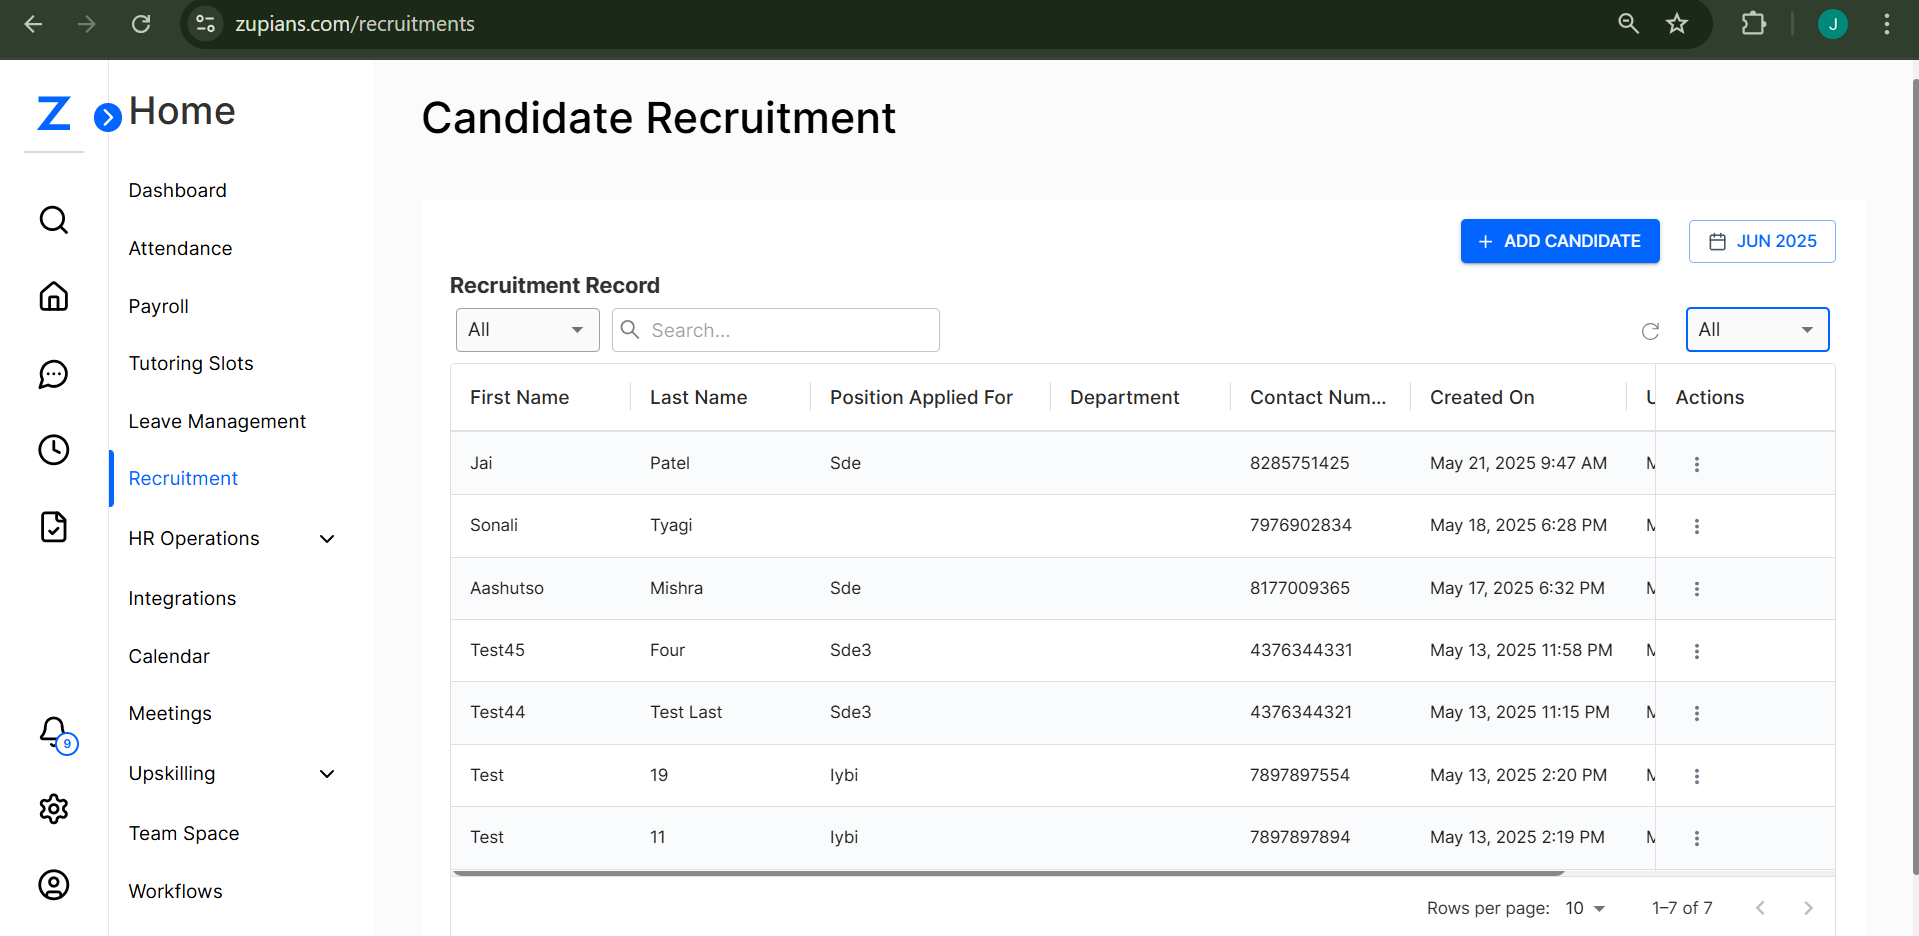
📈 Candidate Records Overview
✅ This table gives you a quick view of candidates currently in the pipeline.
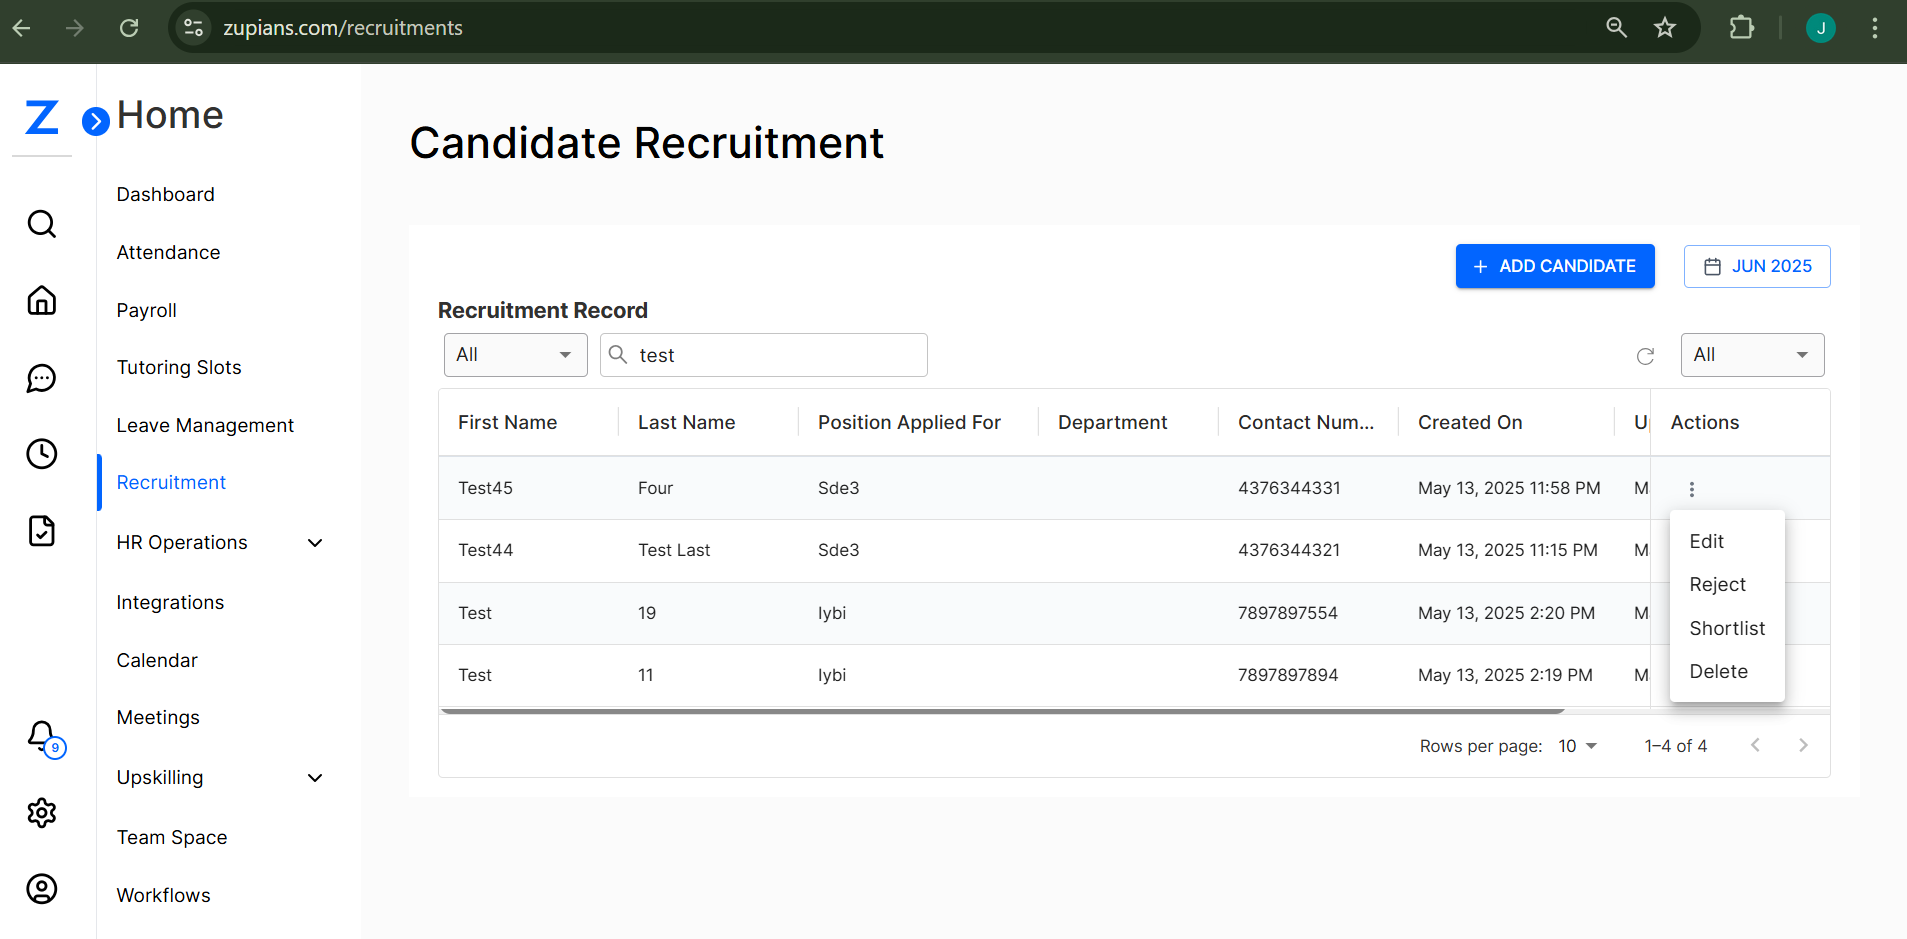
📜 Candidate Record Details
Below the filters is the Candidate Records table, displaying detailed information about every candidate.
Columns include:
- First Name
- Last Name
- Position Applied For
- Department
- Contact Number
- Created On
- Status
Here’s a closer look:
ℹ️ Note: Candidate statuses may include Staging, Shortlisted, Test Cleared, Demo Cleared, Offer Accepted, or Rejected.
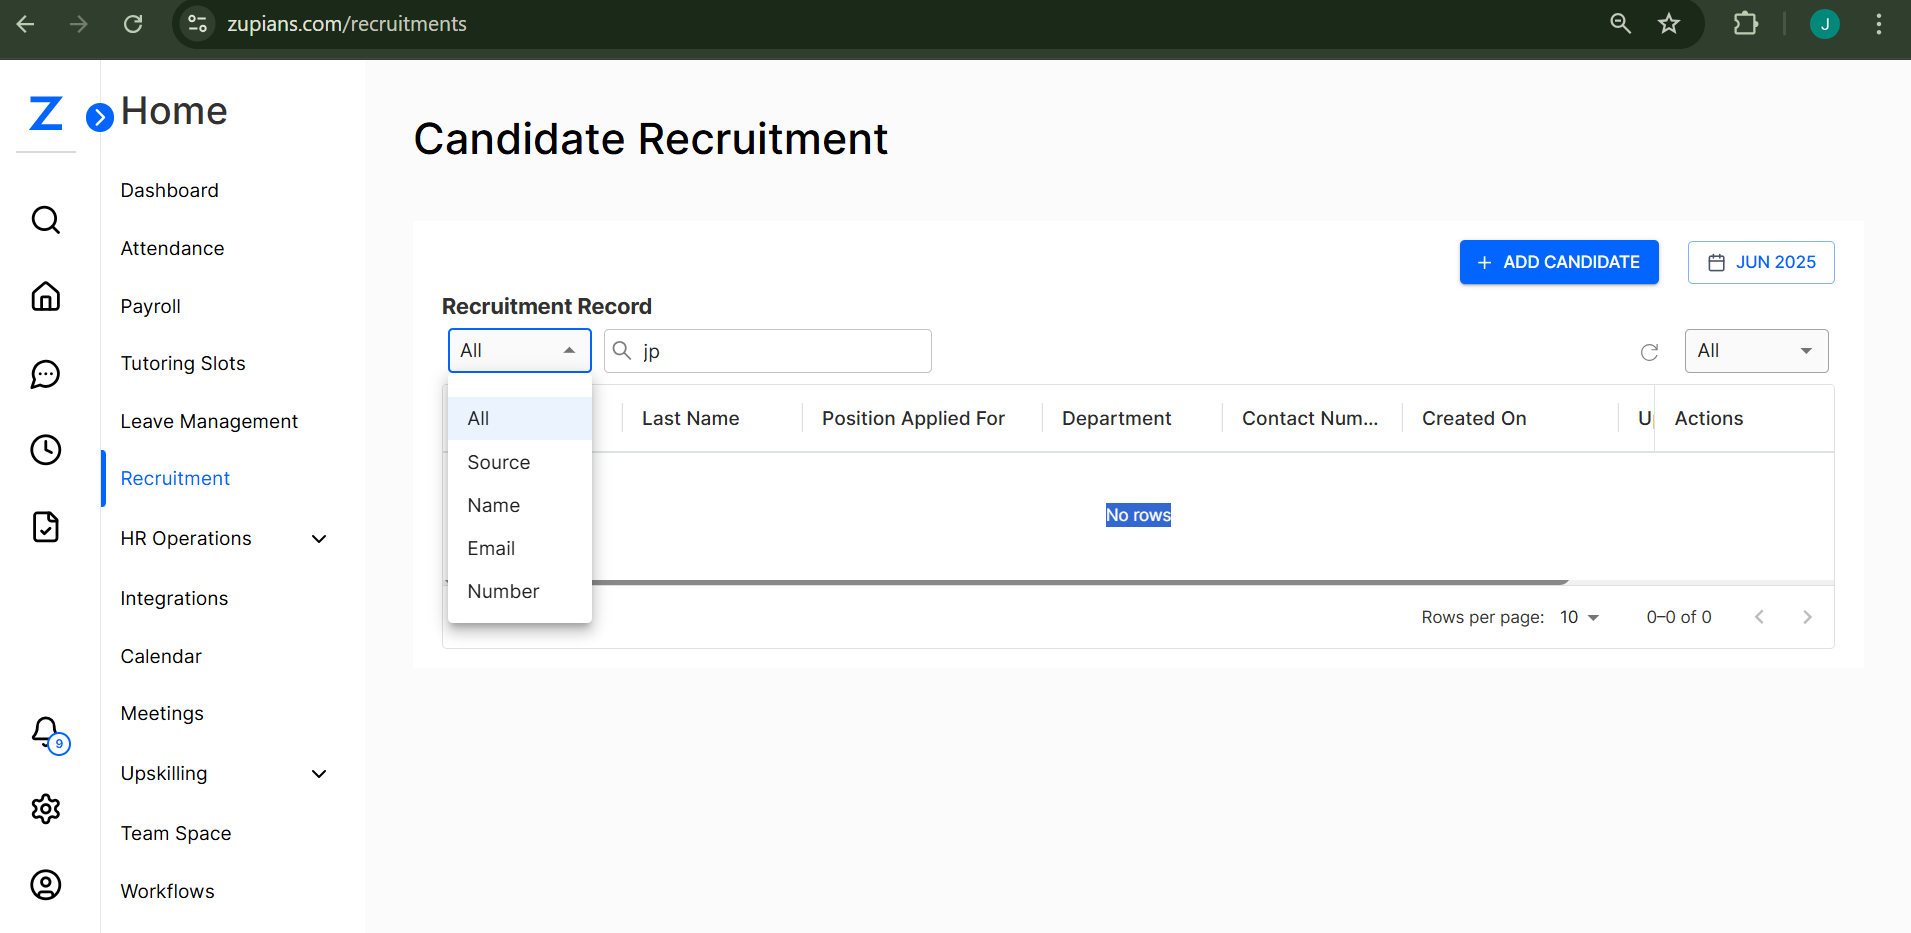
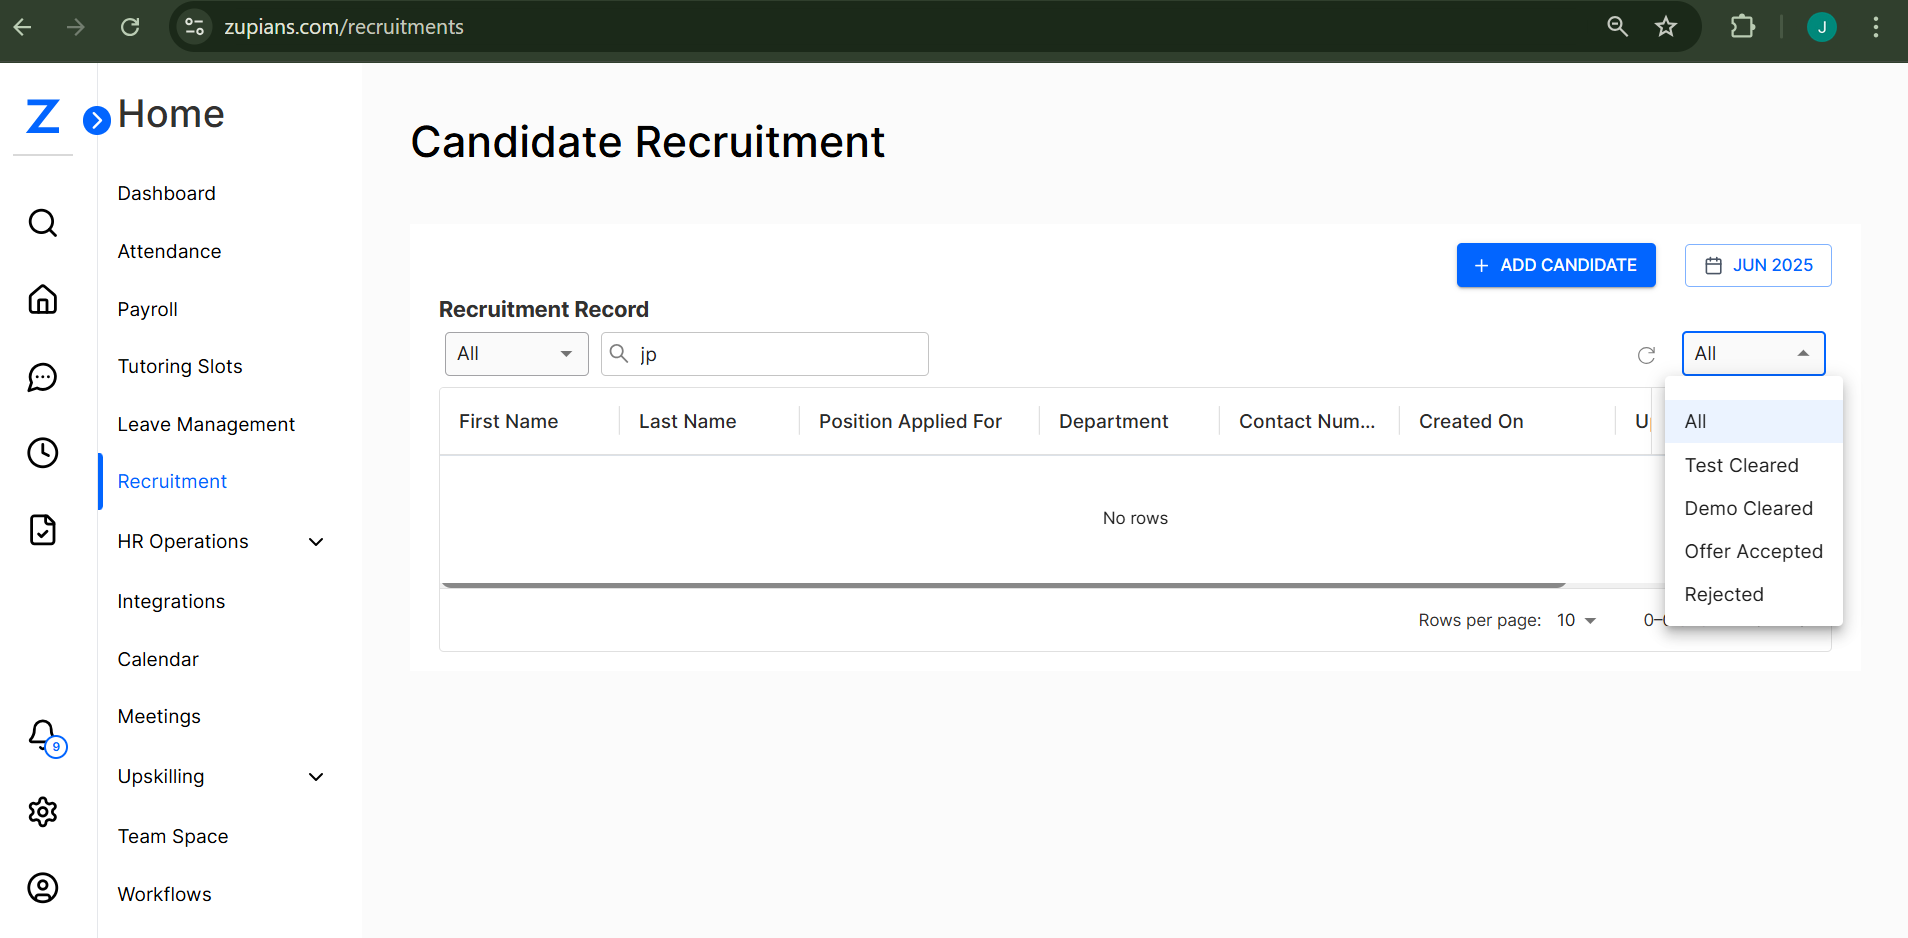
🔍 Filters & Search
✅ Use the dropdown to filter candidates by status (e.g., Test Cleared, Offer Accepted).
✅ Use the search bar to quickly find candidates by name, position, or department.
🗓️ Filter by Month
Select a specific month to view candidates added during that period:
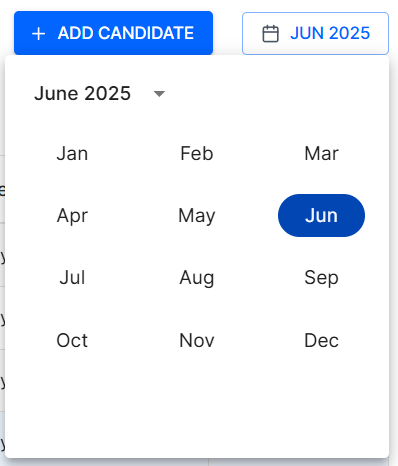
✅ Helpful for tracking hiring trends or monthly recruitment stats.
➕ Add a New Candidate
Click the + Add Candidate button to open the candidate entry form.
Here’s what you’ll need to fill in:
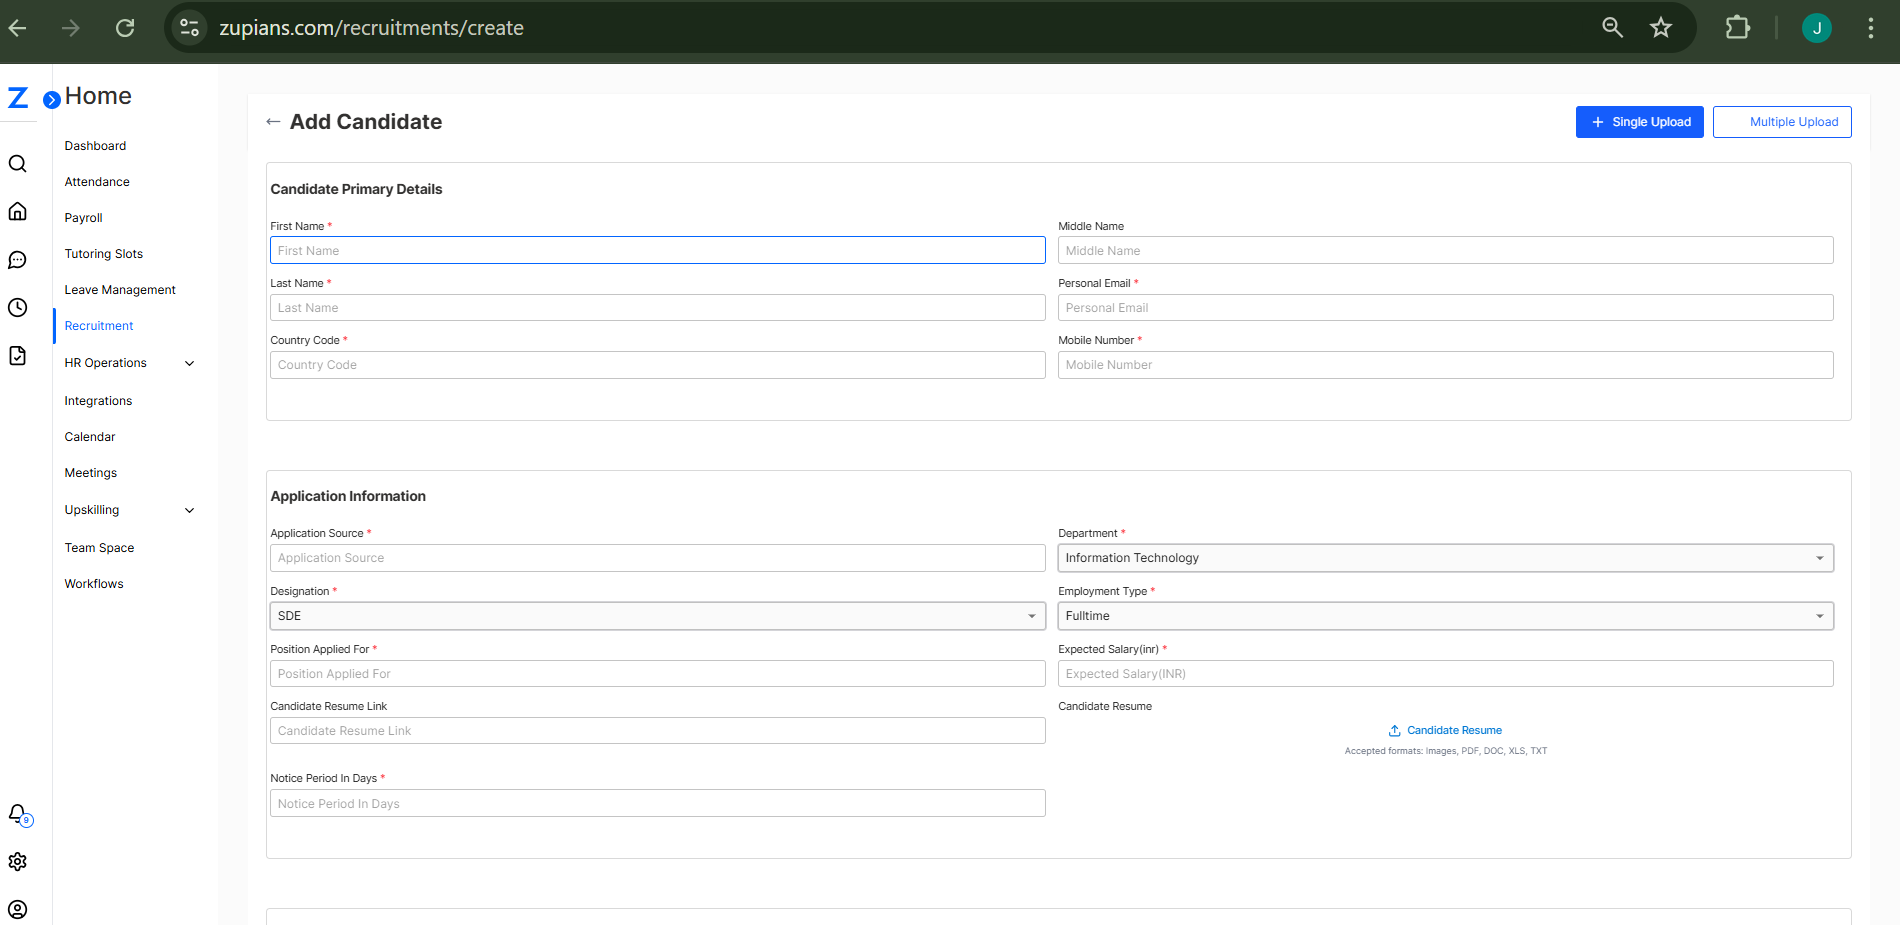
🧾 Primary Details
- First Name, Last Name, Middle Name
- Personal Email
- Country Code & Mobile Number
📄 Application Information
- Application Source
- Position Applied For
- Department
- Designation Type
- Resume Upload & Resume Link
- Notice Period (days)
🧠 Candidate Experience
- Add previous job experience entries (optional)
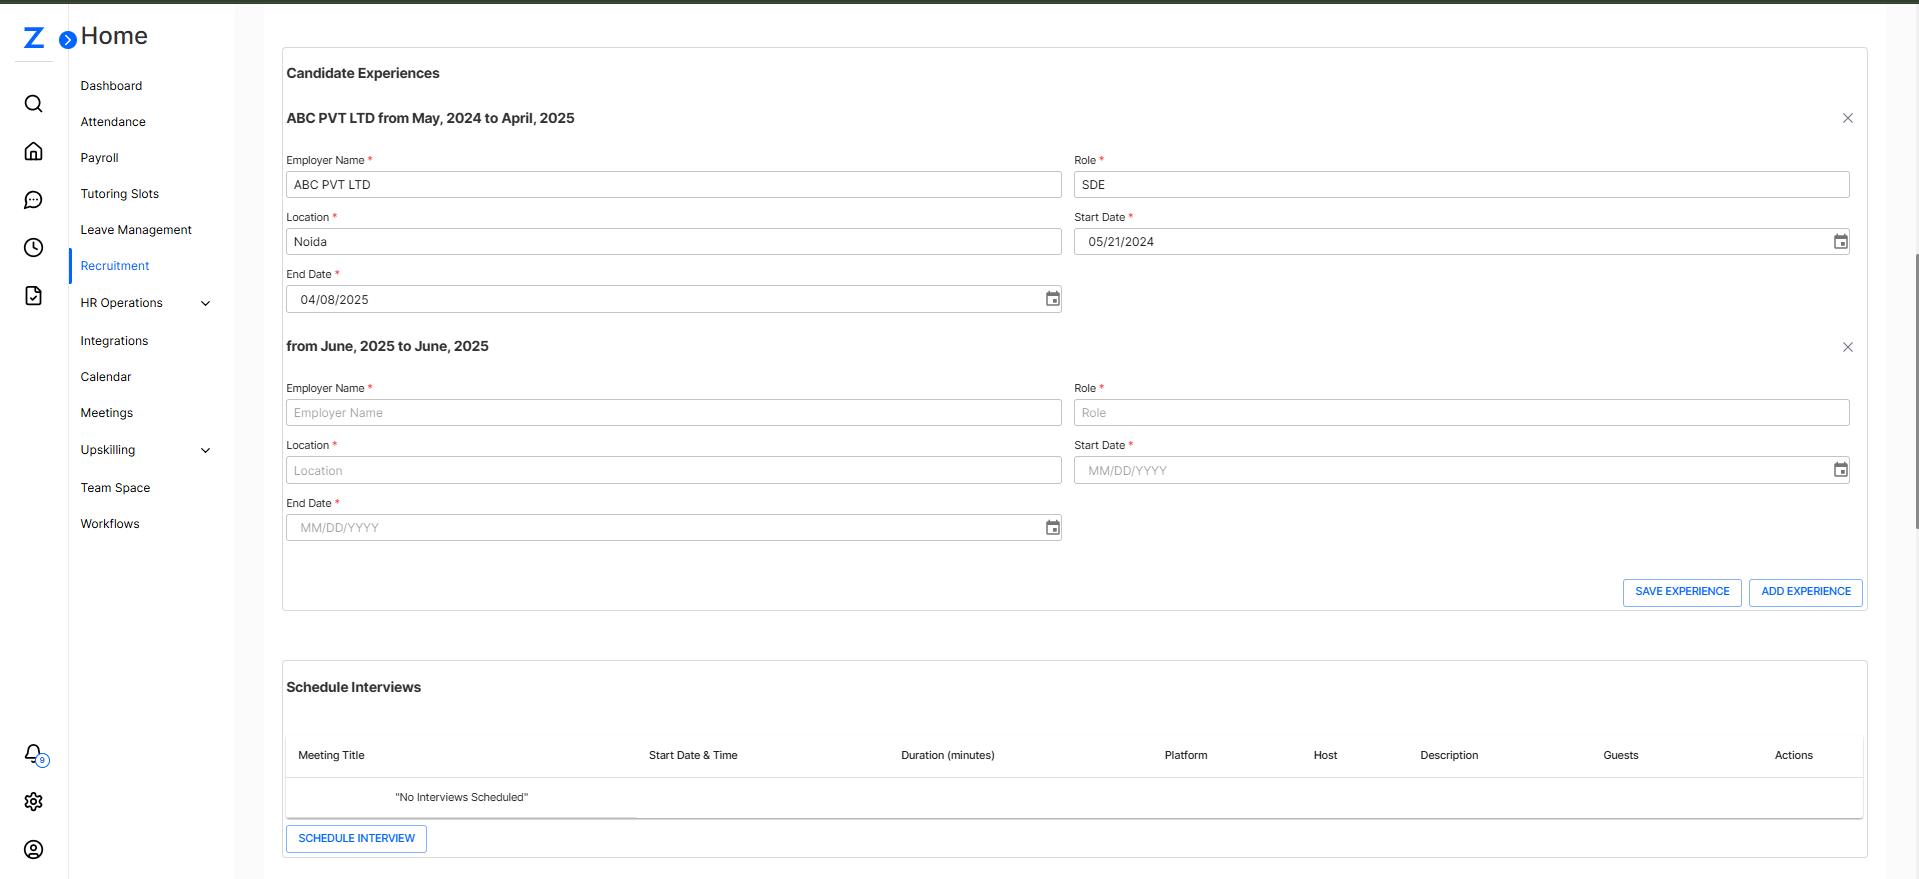
📅 Schedule Interview
- Interview Date, Time, Platform, Duration, and Host

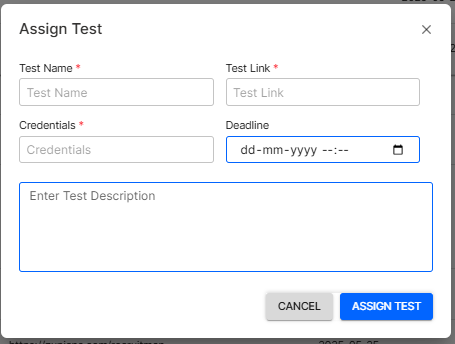
🧪 Assign Test
- Assign relevant assessments (coding, aptitude, etc.) with deadlines
✅ Assign Task
- Add any onboarding or pre-joining tasks
✅ Click Add to Recruitment to finalize and submit the candidate entry,It will get reflected in Recruitment Record.
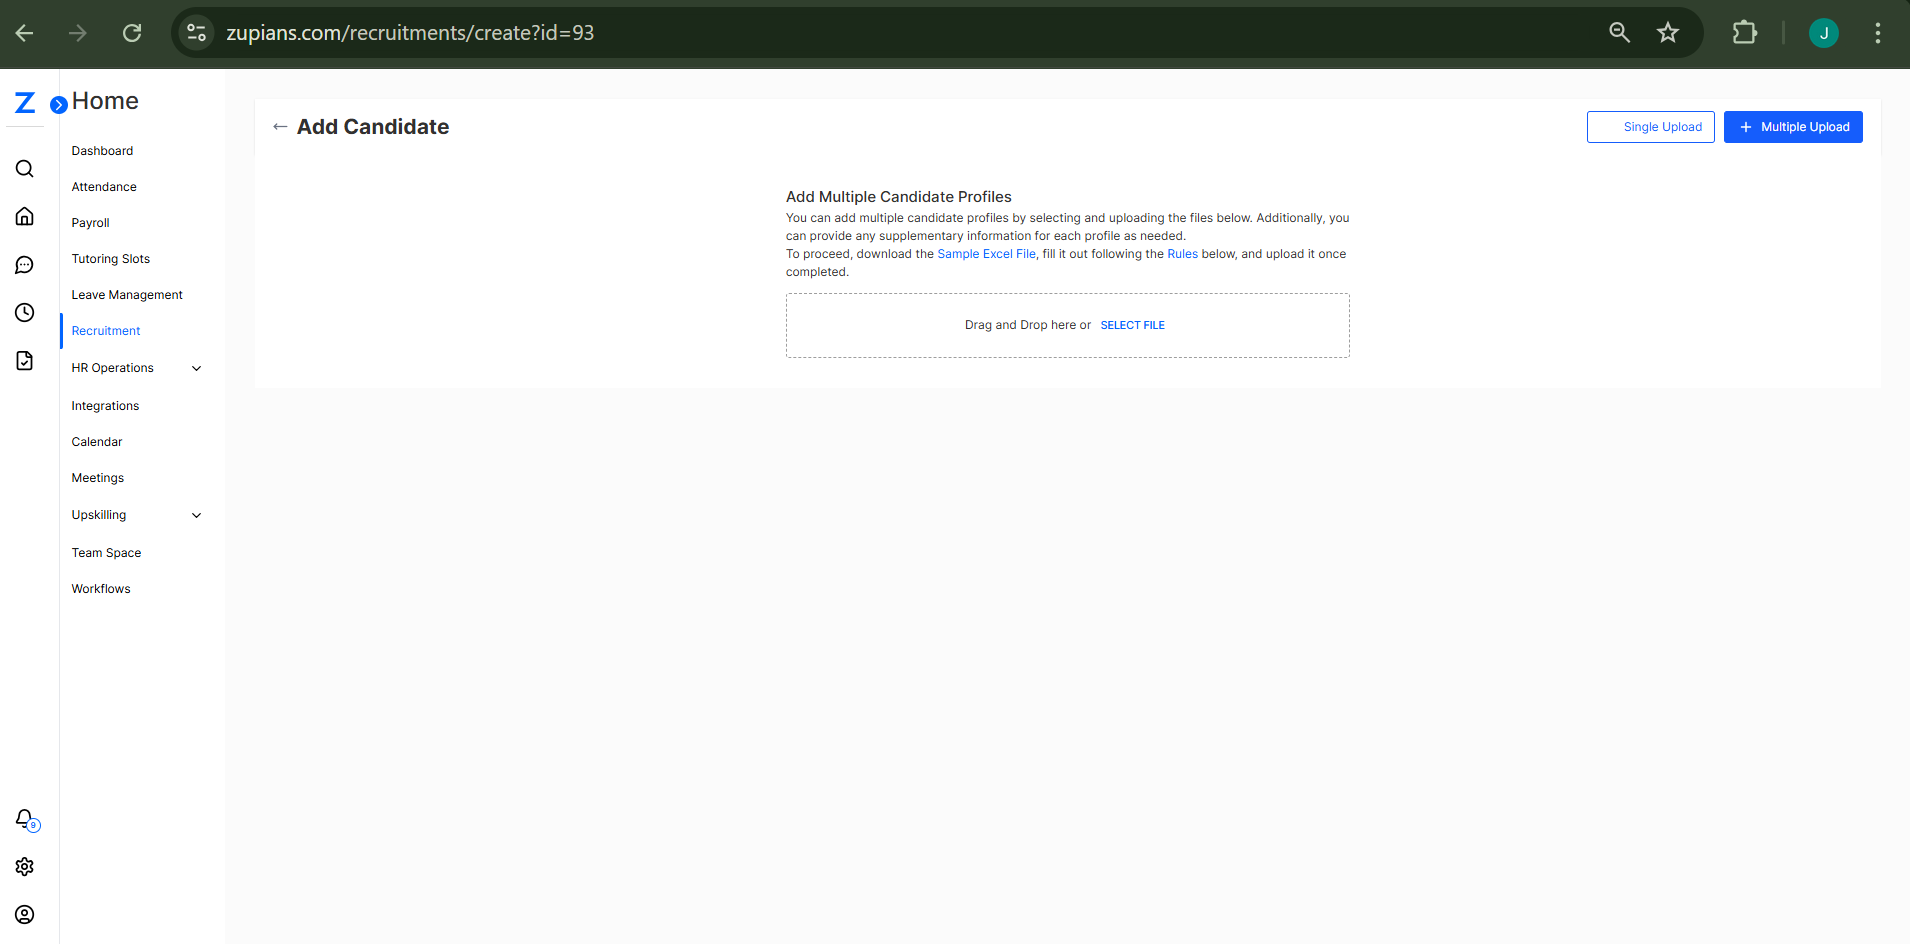
Multiple Candidate Upload
Add Multiple Candidate Profiles
You can add multiple candidate profiles by selecting and uploading the files below. Additionally, you can provide any supplementary information for each profile as needed.
To proceed, download the Sample Excel File, fill it out following the Rules below, and upload it once completed.
🛠️ Candidate Actions
Each candidate row has an Actions menu (⋮) with the following options:
Edit: Update candidate details like name, contact, position, or interview schedule.
Reject: Mark the candidate as Rejected.
Shortlist: Move the candidate to Shortlisted status.
Delete: Permanently remove the candidate from records.
⚠️ Deleting a candidate is irreversible.
🧠 Frequently Asked Questions (FAQ)
How do I update a candidate's status?
Can I delete a candidate after adding them?
What does “Staging” mean?
Can I re-edit a candidate after shortlisting?
How can I find candidates who cleared a test or demo?
Is there a way to track candidates by the month they were added?
I can’t find a candidate I recently added. What should I do?
Can I assign multiple tasks or tests to a candidate?
What happens when a candidate is marked as “Rejected”?
Can I reschedule an interview?
What formats are supported for resume uploads?
Is there a notification system for upcoming interviews or tasks?
⚙️ Tips for Managing Candidates
✅ Regularly update candidate statuses to track progress.
✅ Schedule interviews promptly after shortlisting.
✅ Use filters to monitor specific stages like “Test Cleared” or “Offer Accepted.”
✅ Ensure all contact details are filled accurately for communication.
✅ Review resume links and uploaded documents before proceeding.
That’s it! This guide ensures you’re fully equipped to manage the recruitment process smoothly and effectively. 🚀😊