🖥️ Assets Guide
This guide explains how to add, edit, delete, and view user assets Each action is simple and designed to help HR teams or managers assign and track hardware/software assets provided to users.
🔁 Asset Management Flow
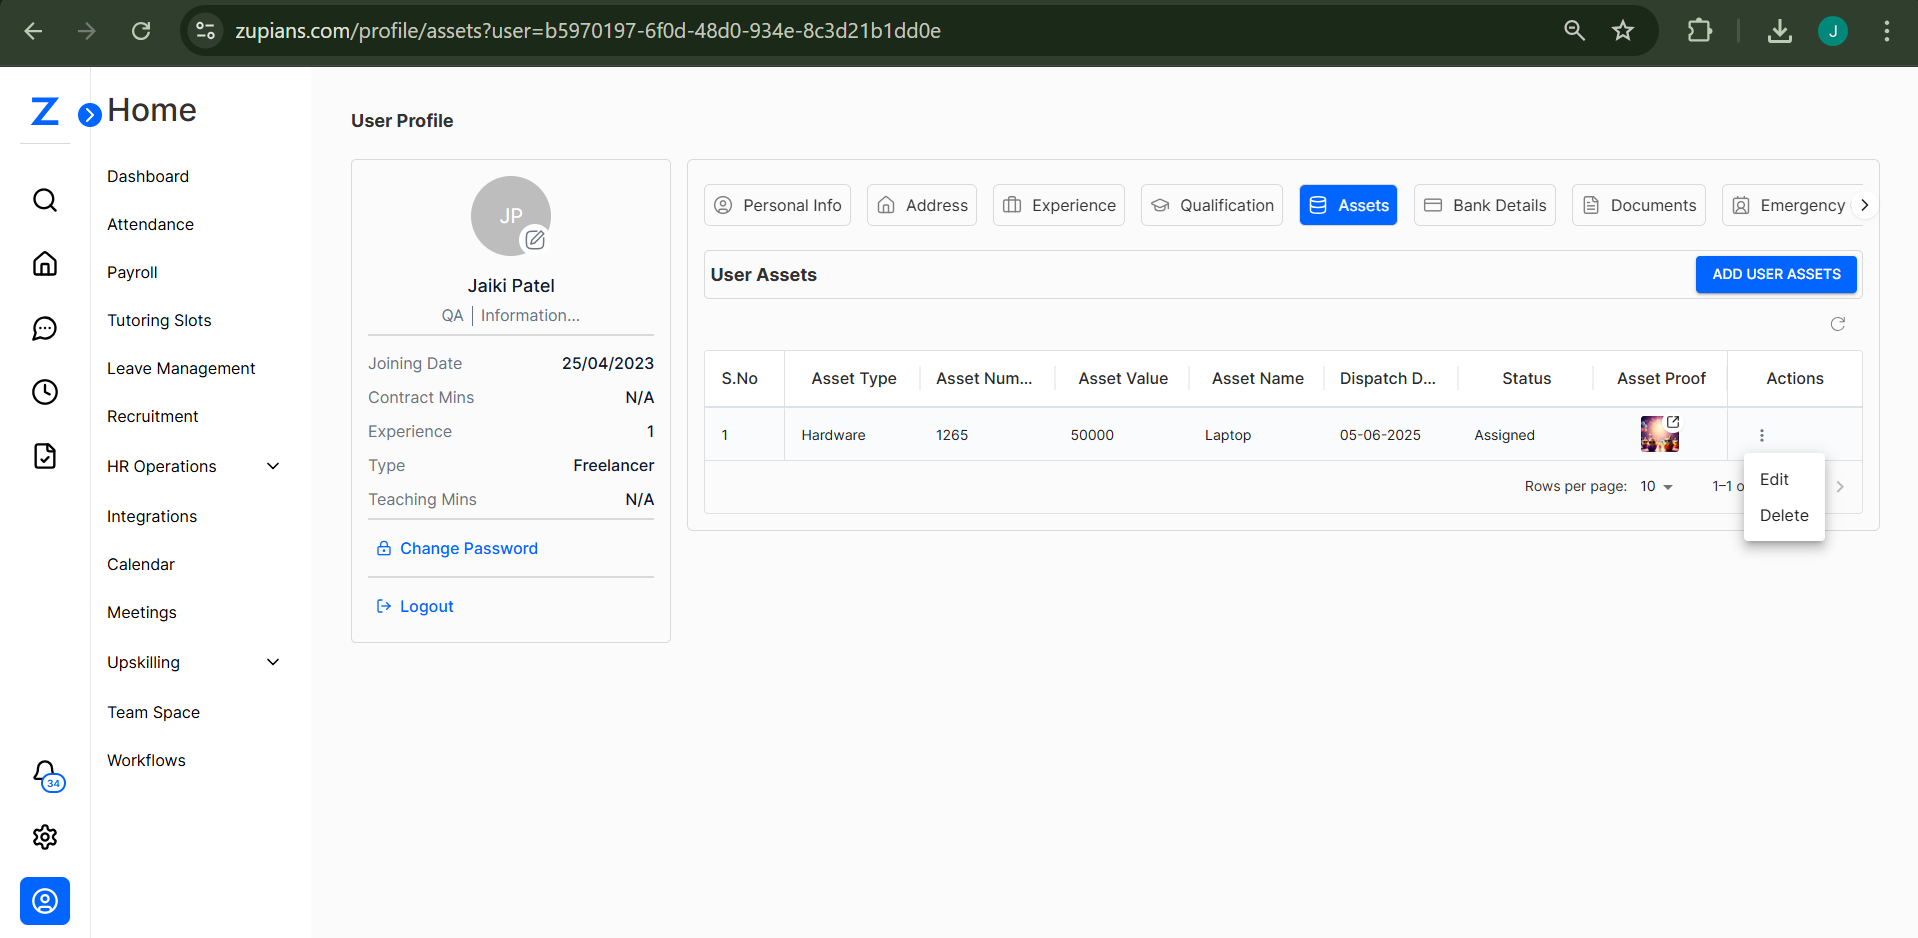
1. View User Assets
To view assigned assets:
- Go to
HR Operations → User Profile → Assets - You will see a table of assigned assets with details like:
- Asset Type
- Asset Number
- Asset Value
- Asset Name
- Dispatch Date
- Status
- Asset Proof
📸 
2. Add User Asset
Click the "Add User Assets" button to open the asset form.
Fill the form with:
- Asset Type (e.g., Hardware, Software)
- Asset Number
- Asset Value
- Asset Name
- Dispatch Date
- Status (Assigned/Returned)
- Asset Proof – Upload a file (PDF, JPG, PNG)
Click Save to add the asset.
📸 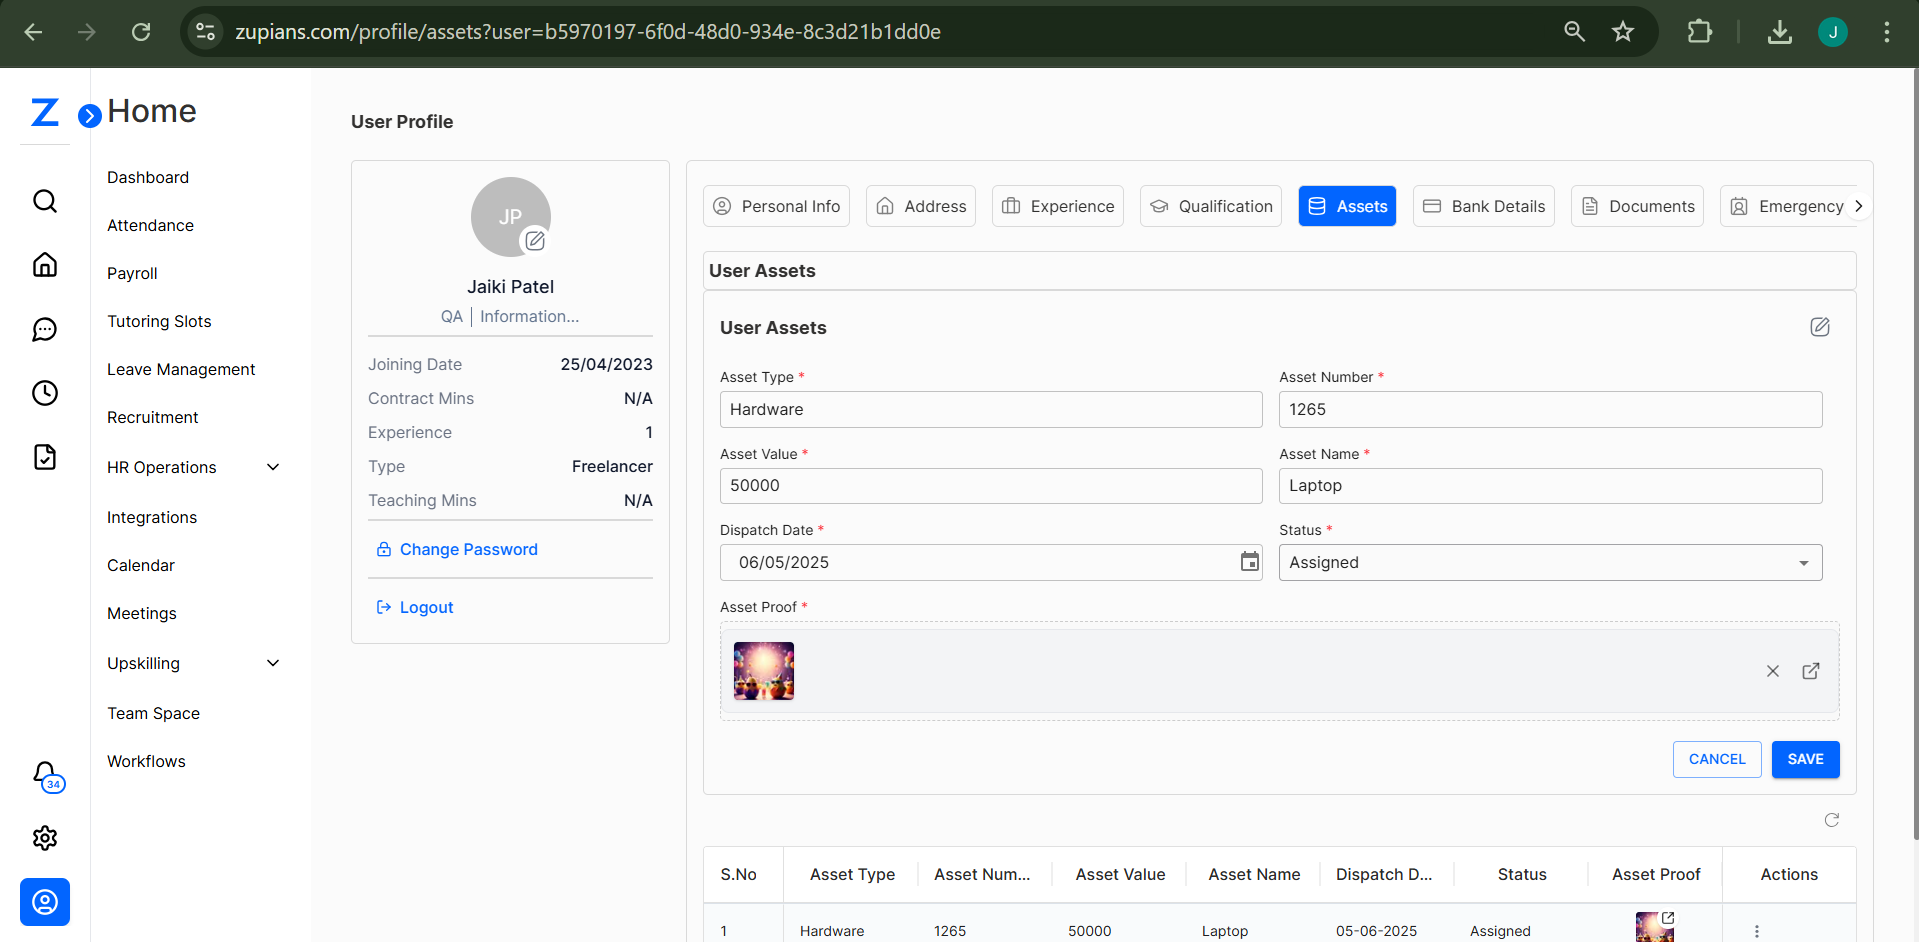
3. Edit User Asset
To update an asset:
- Click the
⋮icon in the Actions column. - Select Edit
- Modify the fields as needed.
- Click Save
📸
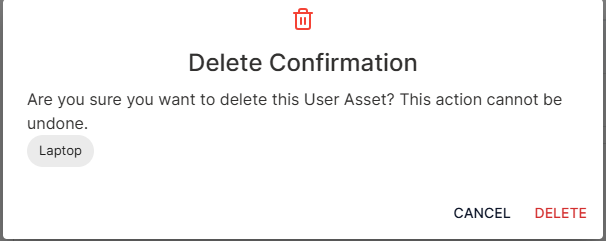
4. Delete User Asset
To remove an asset:
- Click the
⋮icon in the Actions column. - Select Delete
- A confirmation popup will appear.
- Click Delete to confirm.
📸 
🧠 Frequently Asked Questions (FAQ)
1. What types of assets can be assigned?
You can assign both Hardware (e.g., Laptop, Mouse) and Software (e.g., License Keys) assets.
2. Is asset proof mandatory?
Yes. Uploading asset proof is mandatory and helps in tracking physical asset handover.
3. Can we track returned assets?
Yes. Use the Status dropdown to mark assets as Returned once they are handed back.
4. Who can assign assets?
Typically, HR or IT admins with access to the HR Operations module can assign or edit assets.
5. What formats are accepted for proof upload?
You can upload asset proof in PDF, JPG, or PNG formats.